


















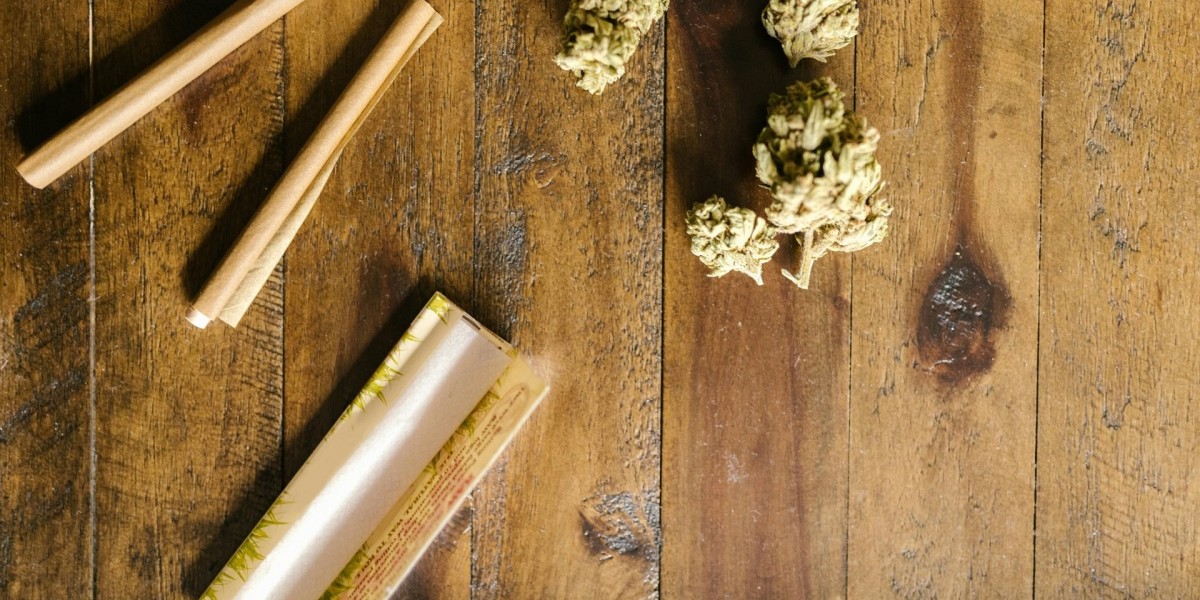
Rolling a joint is one of the most basic and popular methods of consuming cannabis. For many, it’s a relaxing ritual and a great way to enjoy marijuana socially or privately. Whether you’re a first-time smoker or someone looking to improve your joint-rolling skills, this comprehensive guide will walk you through how to roll a joint step by step, ensuring you have everything you need for a smooth and enjoyable experience.
In this tutorial, we’ll cover everything from the basics of rolling a joint to more advanced techniques. You’ll learn about the essential tools and tips that will make rolling a joint an easy and enjoyable process. Whether you’re rolling a joint for the first time or looking to improve your skills, this guide is for you.
Essential Tools for Rolling a Joint
Before we dive into the step-by-step guide on how to roll a joint, let’s talk about the essential tools you need to make the process smoother.
1. Cannabis (Weed): Of course, you’ll need cannabis for the joint. Make sure it’s ground into an even consistency so it burns evenly. You can use a grinder for this purpose, but if you don’t have one, you can break up the buds by hand.
2. Rolling Papers: Rolling papers are thin, lightweight sheets of paper used to wrap your cannabis. They come in various sizes, materials, and flavors. For beginners, it’s recommended to start with a standard-size paper.
3. Filter (Optional): Filters, or tips, are small pieces of cardboard or other material placed at the mouthpiece of the joint. They help prevent the cannabis from being inhaled directly into your mouth and provide structure to the joint. They’re optional but highly recommended, especially for beginners.
4. Grinder (Optional but Recommended): A grinder helps break down cannabis buds into a fine, even consistency. It ensures that your cannabis burns smoothly. While you can break up the weed by hand, a grinder is highly recommended for the best experience.
5. Rolling Tray (Optional): A rolling tray is a flat surface where you can roll your joint without worrying about losing cannabis or making a mess. It’s not necessary but can be very helpful for beginners.
6. Lighter: Once your joint is rolled, you’ll need a lighter to light it up. Make sure to have one nearby before you begin.
Step-by-Step Guide: How to Roll a Joint
Now that you have your tools ready, let’s walk through how to roll a joint step by step. These are simple instructions that will help you roll a joint that’s smooth, well-formed, and easy to smoke.
Step 1: Grind Your Cannabis
The first step in the process of rolling a joint is to grind your cannabis. You want to ensure the cannabis is broken down into a consistent, fine texture. If your cannabis is too chunky, it will burn unevenly and may make rolling more difficult.
Tip: If you don’t have a grinder, you can break the cannabis up by hand, but a grinder will give you a much more even consistency, making your joint burn better.
Once your cannabis is ground, place it onto a flat surface like a rolling tray or a clean piece of paper.
Step 2: Prepare Your Rolling Paper
Take a rolling paper from the pack and place it on a flat surface with the adhesive strip facing up. The adhesive strip is the glue that will seal the joint once you’ve rolled it. Hold the paper so the open side is facing you, with the glue side at the top.
Step 3: Create a Filter (Optional)
If you’re using a filter, take a small piece of cardboard or a pre-made tip and fold it into a "W" shape. Place this filter at one end of the rolling paper. The filter will help provide structure to your joint and make it easier to smoke.
Tip: A filter also prevents weed from getting into your mouth, especially if you're smoking a hand-rolled joint.
Step 4: Fill the Rolling Paper with Cannabis
Now, it’s time to fill your rolling paper with ground cannabis. Take the ground cannabis from your tray and evenly distribute it along the length of the paper. You want to make sure there’s an even amount of cannabis across the paper, leaving a little bit of space at both ends for sealing.
Tip: The amount of cannabis you use depends on your personal preference. For beginners, it’s a good idea to start with a smaller amount to ensure the joint isn’t too tight.
Step 5: Shape the Joint
With your cannabis evenly spread across the rolling paper, use your fingers to gently roll the paper back and forth. This will help form the cannabis into a cylinder shape. Be careful not to apply too much pressure, as this can cause the cannabis to shift unevenly.
Tip: If you notice that the cannabis is unevenly distributed, feel free to redistribute it using your fingers. Take your time during this step to ensure the joint has a smooth, consistent shape.
Step 6: Roll the Paper
Once your cannabis is shaped, start rolling the paper between your fingers. Gently pinch the paper and cannabis together and start rolling it back and forth. Once you’ve rolled the cannabis into a cylindrical shape, begin to tuck the paper's edge closest to you under the cannabis.
Tip: As you roll, make sure to keep the paper tight around the cannabis. Too loose, and the joint may burn unevenly; too tight, and the joint might not draw properly.
Step 7: Seal the Joint
After the joint is rolled into a cylindrical shape, lick the adhesive strip at the top of the rolling paper and seal the joint. The moisture from your tongue will activate the glue, allowing you to press the paper down and seal the joint.
Tip: Make sure the joint is sealed properly to prevent it from unrolling as you smoke it. Gently press the seam to ensure it sticks.
Step 8: Pack the End (Optional)
If the end of the joint feels a bit loose, you can pack it down using a pen or a similar object. This will help ensure the cannabis is tightly packed and won’t fall out as you smoke.
Tip: This is particularly important if you're rolling a joint without a filter. Packing the end will help the joint burn evenly.
Step 9: Light It Up
Your joint is now ready to be smoked. Light the end of the joint with a lighter, ensuring the flame touches the tip of the joint. Once it’s lit, take a slow, steady drag to get the smoke flowing.
Tip: If the joint doesn’t light evenly, rotate it slightly to ensure an even burn.
Tips for Rolling the Perfect Joint
Now that you know the basic steps of rolling a joint, here are some tips to improve your technique and make your joints burn better and taste smoother.
1. Use Fresh Cannabis
Fresh cannabis is much easier to roll and generally burns more evenly. If your cannabis is too dry, it may crumble easily and be harder to roll. Make sure to store your weed in a cool, dry place to preserve its freshness.
2. Practice Makes Perfect
Rolling a joint is a skill that takes time to perfect. Don’t worry if your first joint doesn’t look perfect. With practice, you’ll be able to roll joints that are smooth, tight, and even.
3. Use the Right Size Paper
Different sizes of rolling papers are available, ranging from small to king-size. As a beginner, it’s best to start with standard-sized papers. Once you’re comfortable, you can experiment with different sizes depending on how much cannabis you want to use.
4. Don’t Overfill
It’s tempting to load a joint with as much weed as possible, but this can make it difficult to roll and can cause it to burn unevenly. Start with a moderate amount of cannabis and adjust as you get more experienced.
5. Roll with a Filter for a Better Smoking Experience
Filters help provide structure to the joint and make smoking more enjoyable by preventing cannabis from getting into your mouth. They also allow for an easier draw and smoother smoke.
6. Tighten and Pack as You Go
If your joint feels loose, don’t be afraid to gently pack the cannabis down as you roll. This will prevent it from becoming too loose and ensure a smooth smoking experience.
7. Use a Rolling Machine (Optional)
If you’re still struggling with hand-rolling, you can always use a rolling machine. These devices help evenly distribute cannabis and ensure that the joint is rolled tightly, making it easier for beginners.
Final Thoughts on Rolling a Joint
Rolling a joint may seem intimidating at first, but with the right tools, a little practice, and some patience, you can master the art of joint rolling. Whether you’re rolling a joint for a social setting or a quiet evening of relaxation, learning how to roll a joint is a valuable skill that will serve you well as a cannabis consumer.
Remember, practice makes perfect. Don’t be discouraged if your first few joints aren’t as neat as you’d like them to be. With time, you’ll develop your technique and be able to roll perfect joints every time.


